Hi,
During the last few weeks I was interested in cross-compiling for the RPi. I have gone through many tutorials and blog posts to get the task done , so I tried to compile as many information as I can in this guide as a future reference and to help everybody else [The post is long, use CTRL+F for navigation].
Topics:
- Getting started , setting up the cross-compilation toolchain.
- Hello World! Building an RPi C application using shell.
- Hello World 2! Building an RPi C application using eclipse.
- Remote debugging the RPi with gdb on eclipse + RSE plugin.
- Updating your kernel. RPi Kernel cross-compilation.
- Extra: How does the bootloader work ??
Let’s get started with cross-compiling a Pie , there are usually 2 configurations :
- either to build the tool chain yourself on your host machine;
- or to get a pre-compiled toolchain (the Canadian cross).

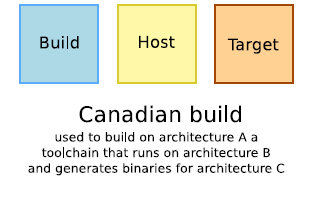
[images from free-electrons embedded training slides]
For this guide I will be using pre-built linaro toolchain(the second way),still I encourage you to try to build the toolchain yourself for the sake of knowledge using one of those excellent tutorials : A and B
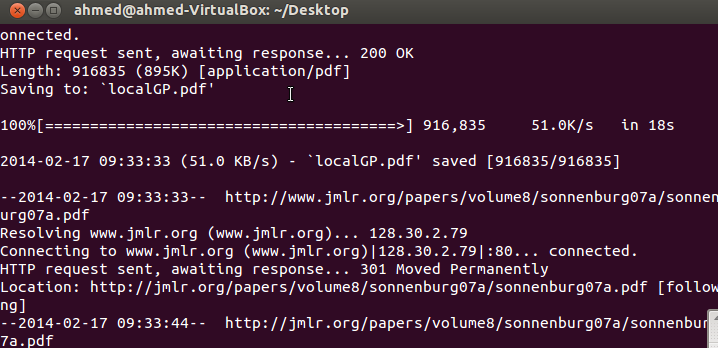
Now, let’s download the Linaro gcc toolchain [source]
$ sudo apt-get install git rsync cmake ia32-libs
$ mkdir raspberrypi
$ cd raspberrypi
$ git clone git://github.com/raspberrypi/tools.git
Add the cross-compile to your $PATH
$ export PATH=$PATH:$HOME/raspberrypi/tools/arm-bcm2708/gcc-linaro-arm-linux-gnueabihf-raspbian/bin
And finally append the very same line to the end of your ~/.bashrc file to make the change permnant
That’s it, now try
$ arm-linux-gnueabihf-gcc -v
should give you something like this
 Using built-in specs.

COLLECT_GCC=arm-linux-gnueabihf-gcc

COLLECT_LTO_WRAPPER=/home/ahmed/raspberrypi/tools/arm-bcm2708/gcc-linaro-arm-linux-gnueabihf-raspbian/bin/../libexec/gcc/arm-linux-gnueabihf/4.8.3/lto-wrapper

Target: arm-linux-gnueabihf

Configured with: /cbuild/slaves/oorts/crosstool-ng/builds/arm-linux-gnueabihf-raspbian-linux/.build/src/gcc-linaro-4.8-2014.01/configure --build=i686-build_pc-linux-gnu --host=i686-build_pc-linux-gnu --target=arm-linux-gnueabihf --prefix=/cbuild/slaves/oorts/crosstool-ng/builds/arm-linux-gnueabihf-raspbian-linux/install --with-sysroot=/cbuild/slaves/oorts/crosstool-ng/builds/arm-linux-gnueabihf-raspbian-linux/install/arm-linux-gnueabihf/libc --enable-languages=c,c++,fortran --disable-multilib --enable-multiarch --with-arch=armv6 --with-tune=arm1176jz-s --with-fpu=vfp --with-float=hard --with-pkgversion='crosstool-NG linaro-1.13.1-4.8-2014.01 - Linaro GCC 2013.11' --with-bugurl=https://bugs.launchpad.net/gcc-linaro --enable-__cxa_atexit --enable-libmudflap --enable-libgomp --enable-libssp --with-gmp=/cbuild/slaves/oorts/crosstool-ng/builds/arm-linux-gnueabihf-raspbian-linux/.build/arm-linux-gnueabihf/build/static --with-mpfr=/cbuild/slaves/oorts/crosstool-ng/builds/arm-linux-gnueabihf-raspbian-linux/.build/arm-linux-gnueabihf/build/static --with-mpc=/cbuild/slaves/oorts/crosstool-ng/builds/arm-linux-gnueabihf-raspbian-linux/.build/arm-linux-gnueabihf/build/static --with-isl=/cbuild/slaves/oorts/crosstool-ng/builds/arm-linux-gnueabihf-raspbian-linux/.build/arm-linux-gnueabihf/build/static --with-cloog=/cbuild/slaves/oorts/crosstool-ng/builds/arm-linux-gnueabihf-raspbian-linux/.build/arm-linux-gnueabihf/build/static --with-libelf=/cbuild/slaves/oorts/crosstool-ng/builds/arm-linux-gnueabihf-raspbian-linux/.build/arm-linux-gnueabihf/build/static --enable-threads=posix --disable-libstdcxx-pch --enable-linker-build-id --enable-plugin --enable-gold --with-local-prefix=/cbuild/slaves/oorts/crosstool-ng/builds/arm-linux-gnueabihf-raspbian-linux/install/arm-linux-gnueabihf/libc --enable-c99 --enable-long-long --with-float=hard

Thread model: posix

gcc version 4.8.3 20140106 (prerelease) (crosstool-NG linaro-1.13.1-4.8-2014.01 - Linaro GCC 2013.11)
Now let’s build a simple application , use your favorite editor to write helloworld.c
#include <stdio.h>
int main()
{
   printf("Hello world \n");
   return 0;
}
and compile it using the usual gcc way
$ arm-linux-gnueabihf-gcc -o helloworld helloworld.c
Copy this to your Pi with a USB flash memory or on the sd card or whatever suits you, launch it and it should work !
pi@raspberrypi:~$ ./helloworld
Hello world
pi@raspberrypi:~$
Now, Let’s add our toolchain to eclipse :
- install C/C++ cross-compiler support plugin;

- from the menu
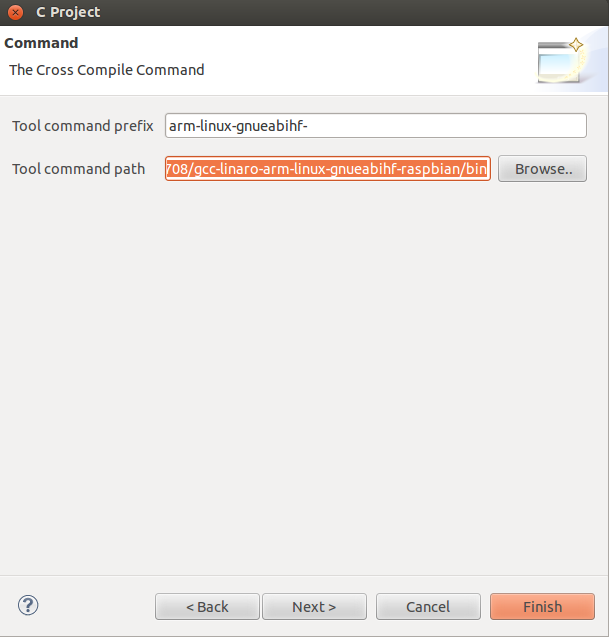
File >> New Project >> C-Project >> Cross-Compile project, input the name of your project and hit next; - enter
arm-linux-gnueabihf-as Tool command prefix and~/raspberrypi/tools/arm-bcm2708/gcc-linaro-arm-linux-gnueabihf-raspbian/binas the tool command path , hit next and finish;
- Congratulations 🙂 !!
It’s important to be able to debug your code online on the RPi, so we are going to use a nice plugin called RSE to do this [source]:
You may use this source code HelloDebug.c if you wish:
#include <stdio.h>

int main()
{
	int i = 0;
	printf("Hello world \n");
	while (i < 1000)
	{
		printf("%d \n",i);
		i++;
	}
	return 0;

}
- install the RSE plugin;

- create a new project with the above source, build it in debug mode (not release);
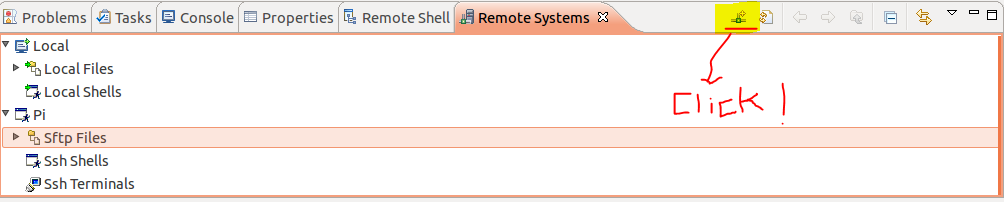
- add a new connection to your RPi from the Remote Systems window (if you can’t see it , add it from W
indow >> Show View >> Others >> Remote Systems) , then hit the tiny button to add an ssh connection to your pi;
- copy the elf executable to the pi using RSE (right click to copy it and paste it on the dir you wish from the stfp menu);

- make sure to
chmod+xthe execultable; - now we will add a new debug configuration , right click on the project and select
Debug as >> Debug Configurationsand add a new C/C++ Remote Application configuration; 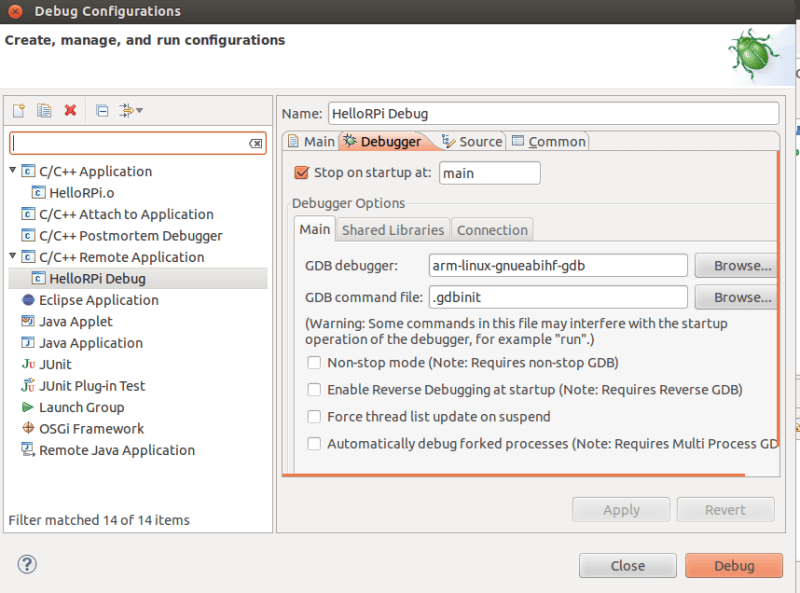
- ensure that in
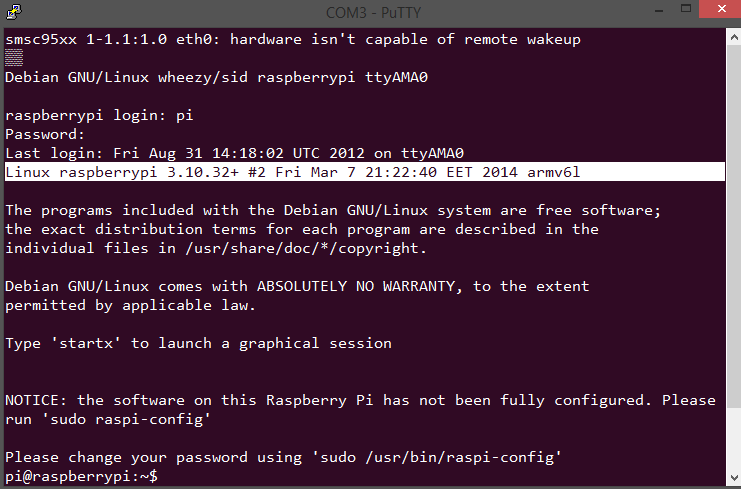
Debugger >> Maintab the debugger isarm-linux-gnueabihf-gdb - login to your pi using ssh to launch the gdbserver $
sudo gdbserver your-linux-pc-ip:any-free-port HelloDebug

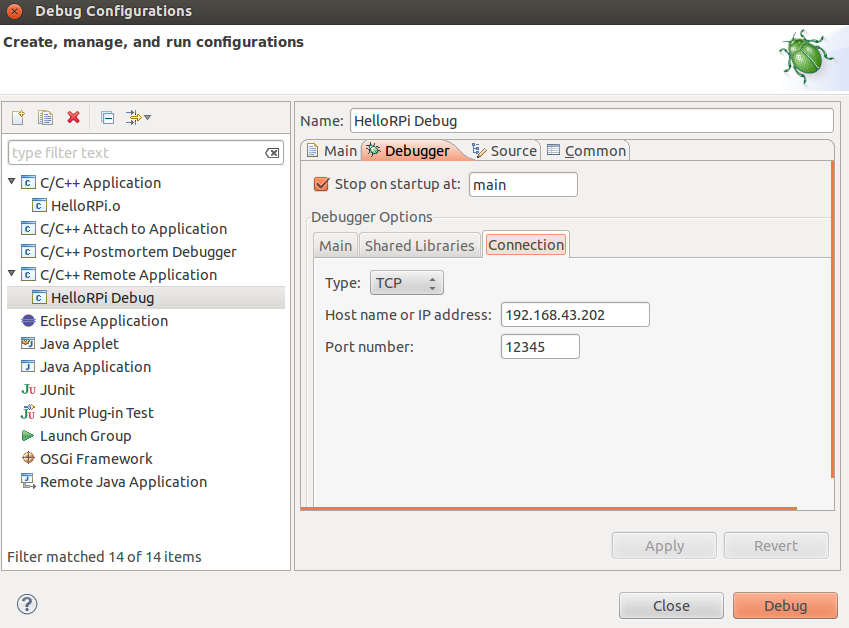
- back to eclipse , ensure that you have the right connection parameters in
Debugger >> Connectiontab where you should pick the RPi IP and the port number you previously picked. - That’s it !! click Debug and enjoy debugging 🙂

Now , there is an excellent tutorial for compiling the kernel [this is not my work, I am just copying it here for future reference because it’s short and to the point ]also elinux wiki has a good compilation:
Create our working directory:
$ mkdir -p raspberrypi/kernel

$ cd raspberrypi/kernel
Before starting our work, install the necessary tools and source code of Raspberry Pi linux:
$ git clone https://github.com/raspberrypi/tools.git

$ git clone https://github.com/raspberrypi/linux.git
Prepare the .config file from pre-packaged config, bcmrpi_cutdown_defconfig:
$ cd linux

$ make ARCH=arm CROSS_COMPILE=/usr/bin/arm-linux-gnueabi- bcmrpi_cutdown_defconfig
Build kernel:
$ make ARCH=arm CROSS_COMPILE=/usr/bin/arm-linux-gnueabi-

$ mkdir ../modules

$ make modules_install ARCH=arm CROSS_COMPILE=/usr/bin/arm-linux-gnueabi- INSTALL_MOD_PATH=../modules/

$ cd ../tools/mkimage/

$ ./imagetool-uncompressed.py ../../linux/arch/arm/boot/Image
Now insert a Raspbian installed SD Card, and run the command:
$ sudo rm /media/<boot-partition>/kernel.img

$ sudo mv kernel.img /media/<boot-partition>/

$ sudo rm -rf /media/<rootfs-partition>/lib/modules/

$ sudo rm -rf /media/<rootfs-partition>/lib/firmware/

$ cd ../../modules/

$ sudo cp -a lib/modules/ /media/<rootfs-partition>/lib/

$ sudo cp -a lib/firmware/ /media/<rootfs-partition>/lib/

$ sync
Now you can remove the SD Card and use it to boot Raspberry Pi with the new kernel.
Finally , here is a nice answer on stackexchange about How the Pi boots and another nice reference :
- When the Raspberry Pi is first turned on, the ARM core is off, and the GPU core is on. At this point the SDRAM is disabled.
- The GPU starts executing the first stage bootloader, which is stored in ROM on the SoC. The first stage bootloader reads the SD card, and loads the second stage bootloader (
bootcode.bin) into the L2 cache, and runs it. bootcode.binenables SDRAM, and reads the third stage bootloader (loader.bin) from the SD card into RAM, and runs it.loader.binreads the GPU firmware (start.elf).start.elfreadsconfig.txt,cmdline.txtandkernel.img
loader.bin doesn’t do much. It can handle .elf files, and so is needed to load start.elf at the top of memory (ARM uses SDRAM from address zero). There is a plan to add elf loading support to bootcode.bin, which would make loader.bin unnecessary, but it’s a low priority (I guess it might save you 100ms on boot).